Stimulus JS & HTML attributes
WARNING
This feature is in the beta phase. The API might change while seeing how the community uses it to build their apps. This is not the dependable fields feature but a placeholder so we can observe and see what we need to ship to make it helpful to you.
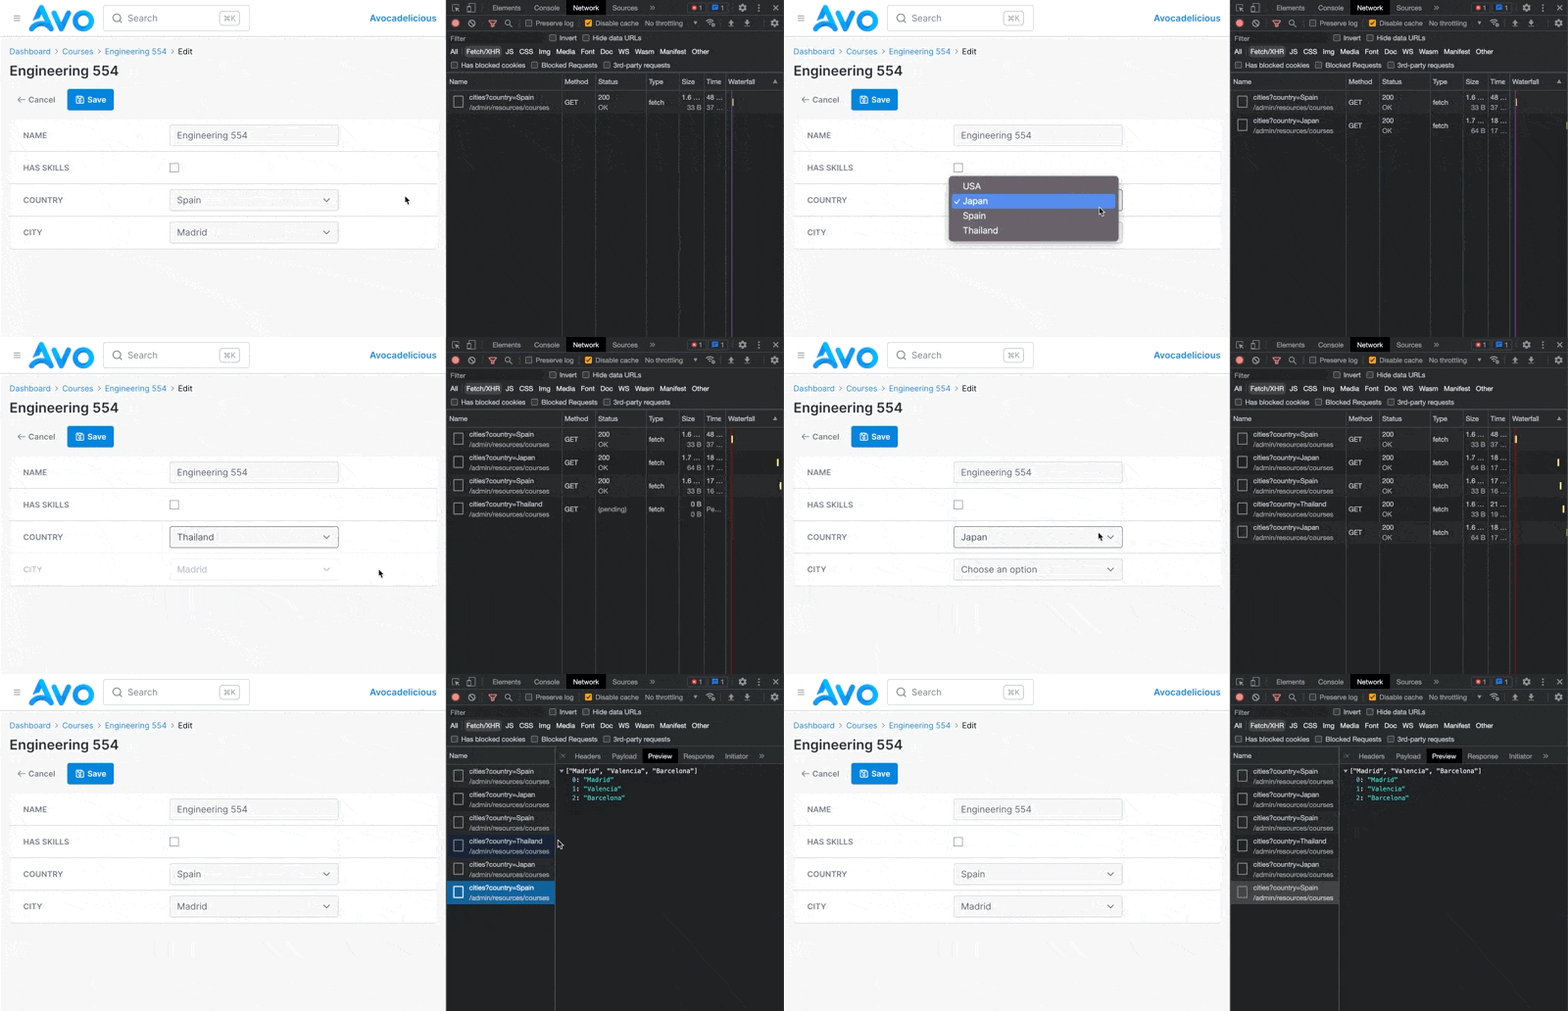
What we'll be able to do at the end of reading these docs
INFO
Please note that in order to have the JS code from your controllers loaded in Avo you'll need to add your asset pipeline using these instructions. It's really easier than it sounds. It's like you'd add a new JS file to your regular Rails app.
One of the most requested features is the ability to make the forms more dynamic. We want to bring the first iteration of this feature through Stimulus JS integration. This light layer will allow you to hook into the views and inject your functionality with Stimulus JS.
You'll be able to add your Stimulus controllers to the resource views (Index, Show, Edit, and New), attach classes, style, and data attributes to the fields and inputs in different views.
Assign Stimulus controllers to resource views
To enable a stimulus controller to resource view, you can use the stimulus_controllers option on the resource file.
class CourseResource < Avo::BaseResource
  self.stimulus_controllers = "course-resource"
end
You can add more and separate them by a space character.
class CourseResource < Avo::BaseResource
  self.stimulus_controllers = "course-resource select-field association-fields"
end
Avo will add a resource-[VIEW] (resource-edit, resource-show, or resource-index) controller for each view.
Field wrappers as targets
By default, Avo will add stimulus target data attributes to all field wrappers. The notation scheme uses the name and field type [FIELD_NAME][FIELD_TYPE]WrapperTarget.
# Wrappers get the `data-[CONTROLLER]-target="nameTextWrapper"` attribute and can be targeted using nameTextWrapperTarget
field :name, as: :text

# Wrappers get the `data-[CONTROLLER]-target="createdAtDateTimeWrapper"` attribute and can be targeted using createdAtDateTimeWrapperTarget
field :created_at, as: :date_time

# Wrappers get the `data-[CONTROLLER]-target="hasSkillsTagsWrapper"` attribute and can be targeted using hasSkillsTagsWrapperTarget
field :has_skills, as: :tags
For example for the following stimulus controllers self.stimulus_controllers = "course-resource select-field association-fields" Avo will generate the following markup for the has_skills field above on the edit view.
<div class="relative flex flex-col md:flex-row md:items-center pb-2 md:pb-0 leading-tight min-h-14"
  data-field-id="has_skills"
  data-field-type="boolean"
  data-resource-edit-target="hasSkillsBooleanWrapper"
  data-course-resource-target="hasSkillsBooleanWrapper"
  data-select-field-target="hasSkillsBooleanWrapper"
  data-association-fields-target="hasSkillsBooleanWrapper"
>
  <!-- Rest of the field content -->
</div>
You can add those targets to your controllers and use them in your JS code.
Field inputs as targets
Similar to the wrapper element, inputs in the Edit and New views get the [FIELD_NAME][FIELD_TYPE]InputTarget. On more complex fields like the searchable, polymorphic belongs_to field, where there is more than one input, the target attributes are attached to all input, select, and button elements.
# Inputs get the `data-[CONTROLLER]-target="nameTextInput"` attribute and can be targeted using nameTextInputTarget
field :name, as: :text

# Inputs get the `data-[CONTROLLER]-target="createdAtDateTimeInput"` attribute and can be targeted using createdAtDateTimeInputTarget
field :created_at, as: :date_time

# Inputs get the `data-[CONTROLLER]-target="hasSkillsTagsInput"` attribute and can be targeted using hasSkillsTagsInputTarget
field :has_skills, as: :tags
All controllers receive the view value
All stimulus controllers receive the view attribute in the DOM.
<div class="space-y-12"
  data-model-id="280"
  data-controller="resource-edit course-resource"
  data-resource-edit-view-value="edit"
  data-course-resource-view-value="edit"
>
  <!-- The fields and panels -->
</div>
Now you can use that inside your Stimulus JS controller like so:
import { Controller } from '@hotwired/stimulus'

export default class extends Controller {
  static values = {
    view: String,
  }

  async connect() {
    console.log('view ->', this.viewValue)
  }
}
The possible values are index, show, edit, or new
Assign Stimulus controllers to actions
Similarly as to resource, you can assign stimulus controller to an action. To do that you can use the stimulus_controllers option on the action file.
class ShowCurrentTime < Avo::BaseAction
  self.stimulus_controllers = "city-in-country"
end
You can add more and separate them by a space character.
class ShowCurrentTime < Avo::BaseAction
  self.stimulus_controllers = "course-resource select-field association-fields"
end
The same way as for the resources, Avo will add stimulus target data attributes to all field wrappers and all input fields.
Unlike with the resource, Avo will not add a specific default controller for each type of the view (index, show, edit). Same way, the controllers will not receive the view attribute in the DOM, as in case of resources.
Attach HTML attributes
Using the html option you can attach style, classes, and data attributes. The style attribute adds the style tag to your element, classes adds the class tag, and the data attribute the data tag to the element you choose.
Pass the style and classes attributes as strings, and the data attribute a Hash.
field :name, as: :text, html: {
  edit: {
    wrapper: {
      style: "background: red; text: white;" # string
      classes: "absolute h-[41px] w-full" # string
      data: {
        action: "input->resource-edit#toggle",
        resource_edit_toggle_target_param: "skills_tags_wrapper",
      } # Hash
    }
  }
}
Declare the fields from the outside in
When you add these attributes, you need to think from the outside in. So first the view (index, show, or edit), next the element to which you add the attribute (wrapper, label, content or input), and then the attribute style, classes, or data.
The edit value will be used for both the Edit and New views.
There are two notations through which you can attach the attributes; object or block notation.
The object notation
This is the simplest way of attaching the attribute. You usually use this when you want to add static content and params.
field :has_skills,
  as: :boolean,
  html: {
    edit: {
      wrapper: {
        classes: "hidden"
      }
    }
  }
In this example, we're adding the hidden class to the field wrapper on the Edit and New views.
The block notation
You can use the' block' notation if you need to do a more complex transformation to add your attributes. You'll have access to the params, current_user, record, and resource variables. It's handy in multi-tenancy scenarios and when you need to scope out the information across accounts.
field :has_skills,
  as: :boolean,
  html: -> do
    edit do
      wrapper do
        classes do
          "hidden"
        end
        data do
          if current_user.admin?
            {
              action: "click->admin#do_something_admin"
            }
          else
            {
              record: record,
              resource: resource,
            }
          end
        end
      end
    end
  end
For the data, style, and classes options, you may use the method notation alongside the block notation for simplicity.
field :has_skills,
  as: :boolean,
  html: -> do
    edit do
      wrapper do
        classes("hidden")
        data({action: "click->admin#do_something_admin"})
      end
    end
  end
Where are the attributes added?
You can add attributes to the wrapper element for the index, show, or edit blocks.
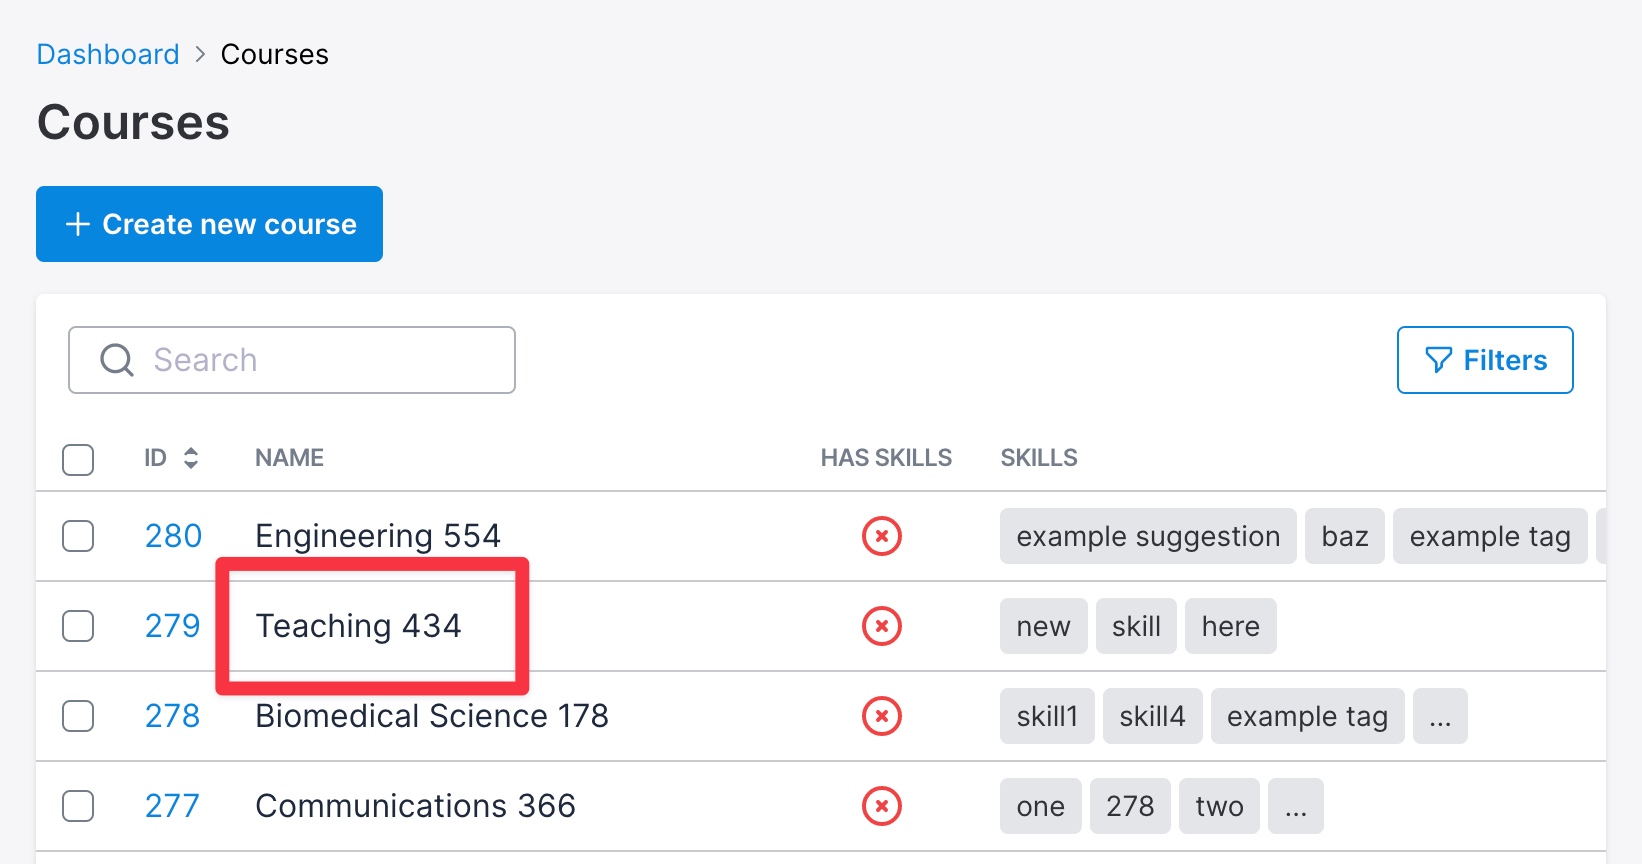
Index field wrapper
field :name, as: :text, html: {
  index: {
    wrapper: {}
  }
}
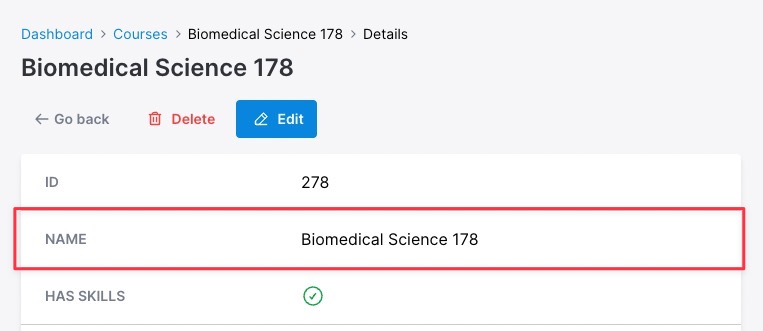
Show field wrapper
field :name, as: :text, html: {
  show: {
    wrapper: {}
  }
}
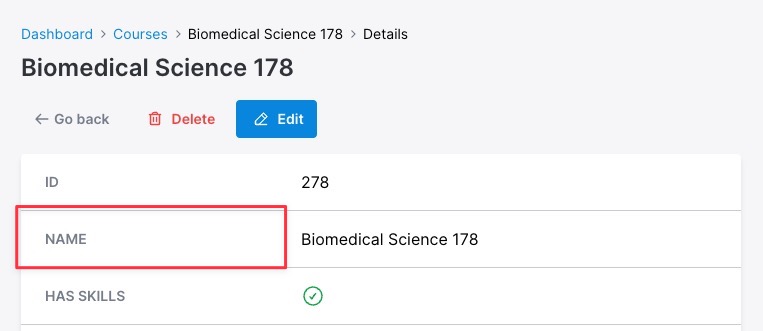
Show label target
field :name, as: :text, html: {
  show: {
    label: {}
  }
}
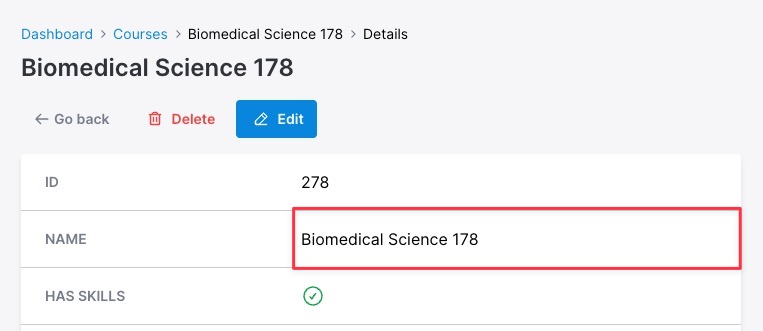
Show content target
field :name, as: :text, html: {
  show: {
    content: {}
  }
}
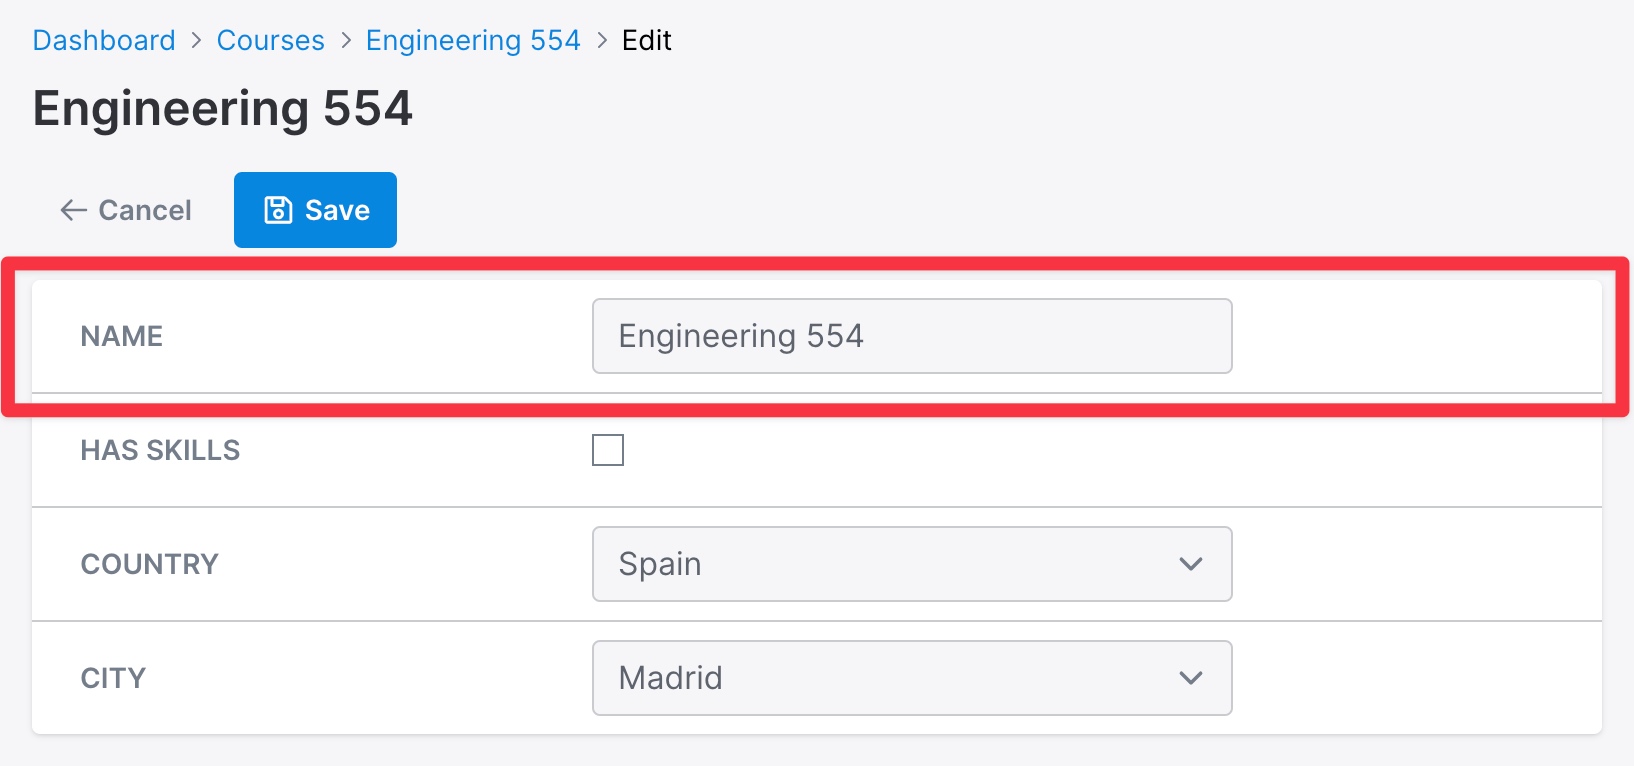
Edit field wrapper
field :name, as: :text, html: {
  edit: {
    wrapper: {}
  }
}
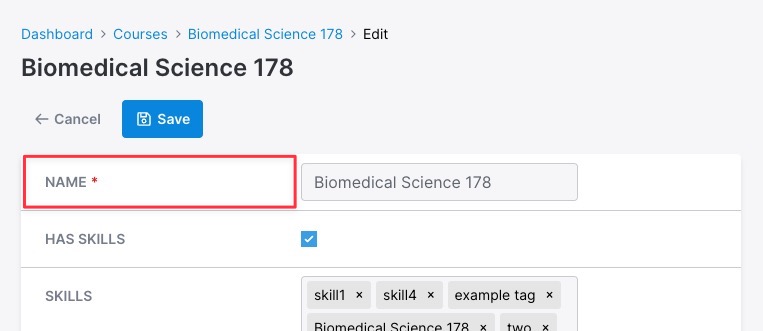
Edit label target
field :name, as: :text, html: {
  edit: {
    label: {}
  }
}
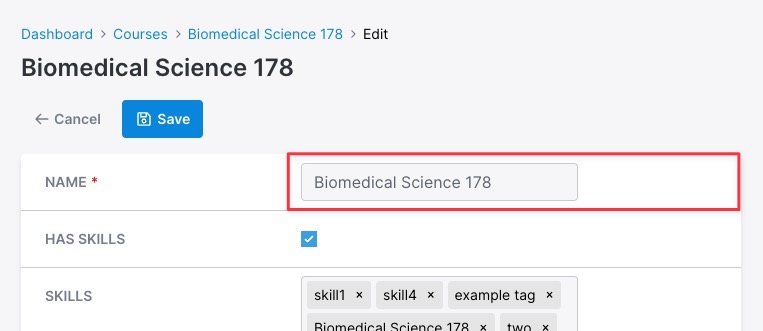
Edit content target
field :name, as: :text, html: {
  edit: {
    content: {}
  }
}
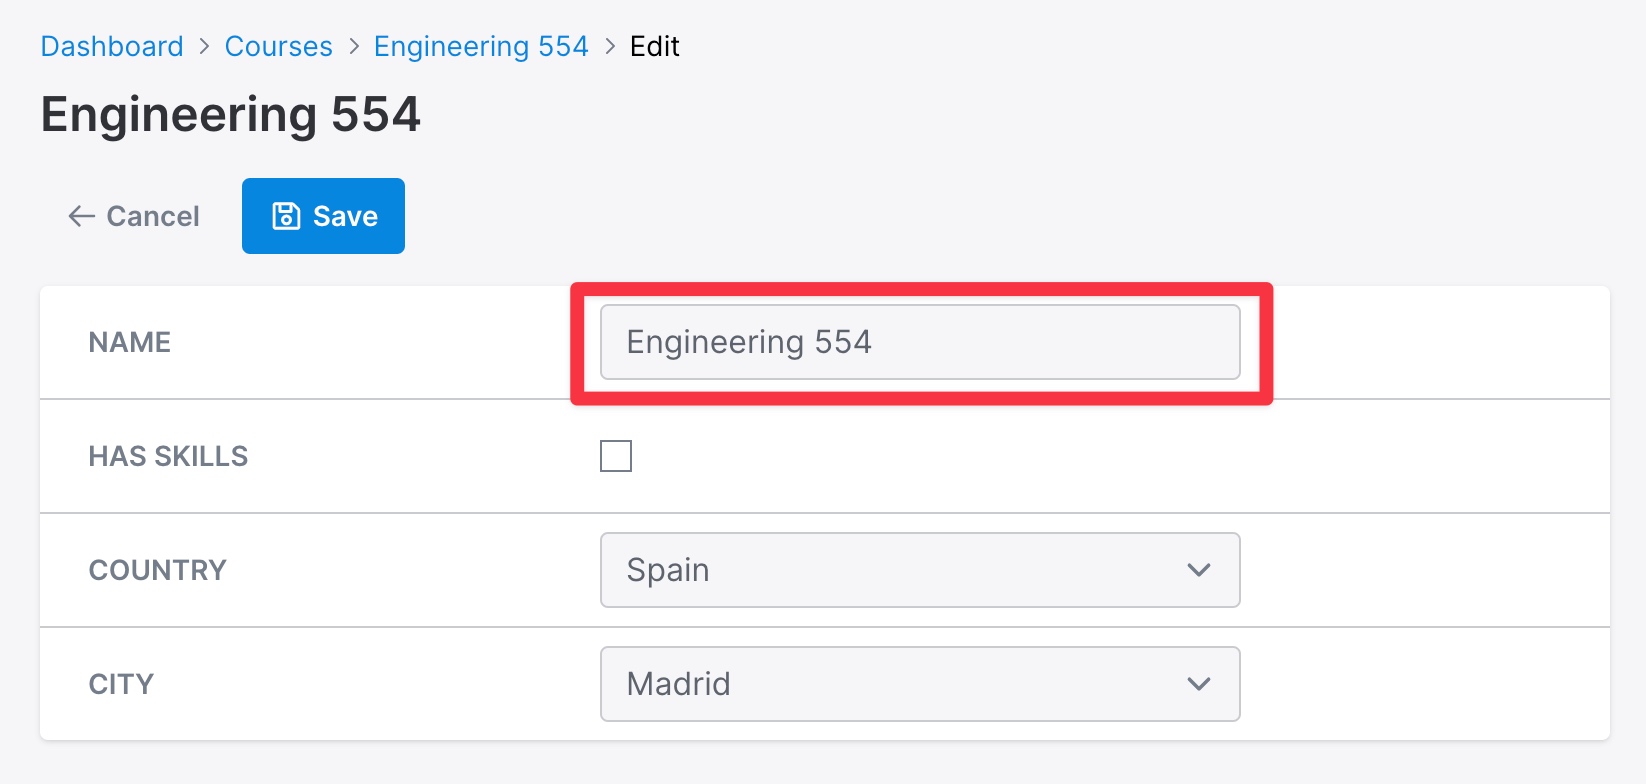
Edit input target
field :name, as: :text, html: {
  edit: {
    input: {}
  }
}
Composing the attributes together
You can use the attributes together to make your fields more dynamic.
  field :has_skills, as: :boolean, html: {
    edit: {
      input: {
        data: {
          # On click run the toggleSkills method on the toggle-fields controller
          action: "input->toggle-fields#toggleSkills",
        }
      }
    }
  }
  field :skills, as: :tags, html: {
    edit: {
      wrapper: {
        # hide this field by default
        classes: "hidden"
      }
    }
}// toggle_fields_controller.js
import { Controller } from "@hotwired/stimulus";
export default class extends Controller {
static targets = ["skillsTagsWrapper"]; // use the target Avo prepared for you
toggleSkills() {
this.skillsTagsWrapperTarget.classList.toggle("hidden");
}
}Pre-made stimulus methods
Avo ships with a few JS methods you may use on your resources.
resource-edit#toggle
On your Edit views, you can use the resource-edit#toggle method to toggle the field visibility from another field.
field :has_country, as: :boolean, html: {
  edit: {
    input: {
      data: {
        action: "input->resource-edit#toggle", # use the pre-made stimulus method on input
        resource_edit_toggle_target_param: "countrySelectWrapper", # target to be toggled
        # resource_edit_toggle_targets_param: ["countrySelectWrapper"] # add more than one target
      }
    }
  }
}
field :country, as: :select, options: Course.countries.map { |country| [country, country] }.to_h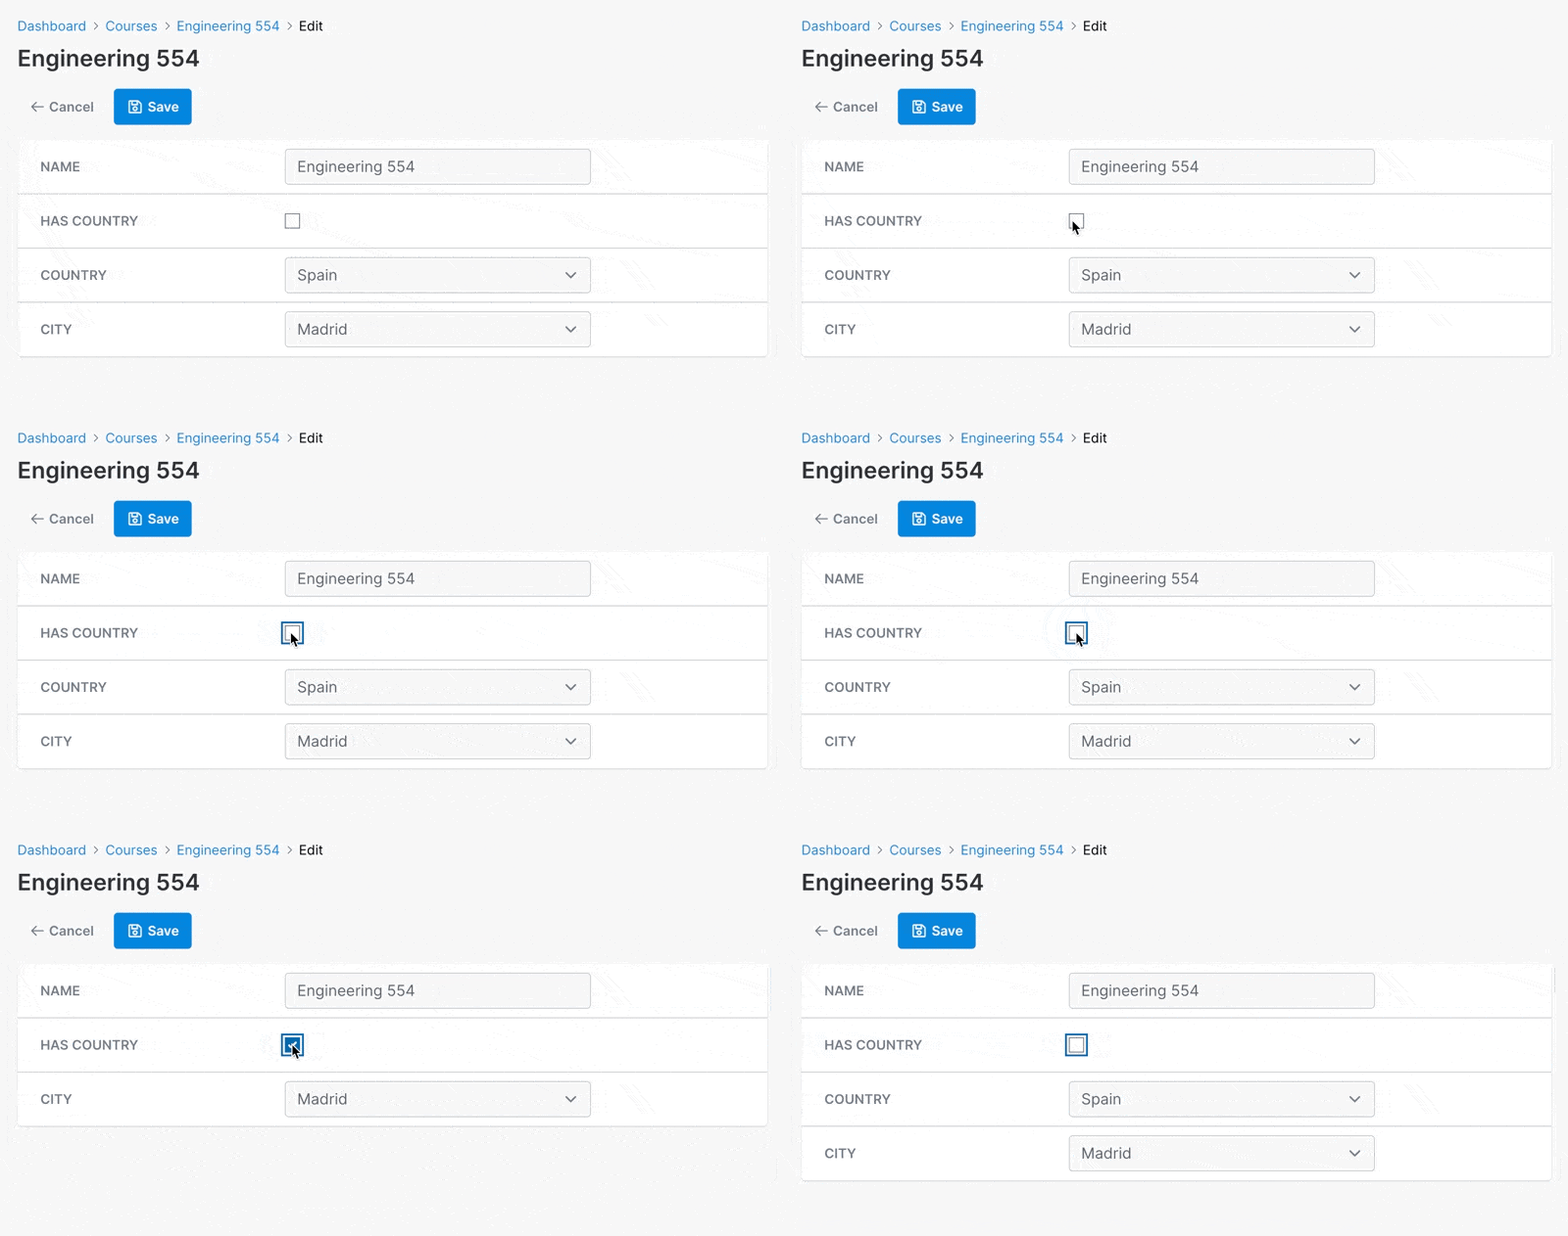
resource-edit#disable
Disable works similarly to toggle, with the difference that it disables the field instead of hiding it.
field :has_skills, as: :boolean, html: {
  edit: {
    input: {
      data: {
        action: "input->resource-edit#disable", # use the pre-made stimulus method on input
        resource_edit_disable_target_param: "countrySelectInput", # target to be disabled
        # resource_edit_disable_targets_param: ["countrySelectWrapper"] # add more than one target to disable
      }
    }
  }
}
field :country, as: :select, options: Course.countries.map { |country| [country, country] }.to_h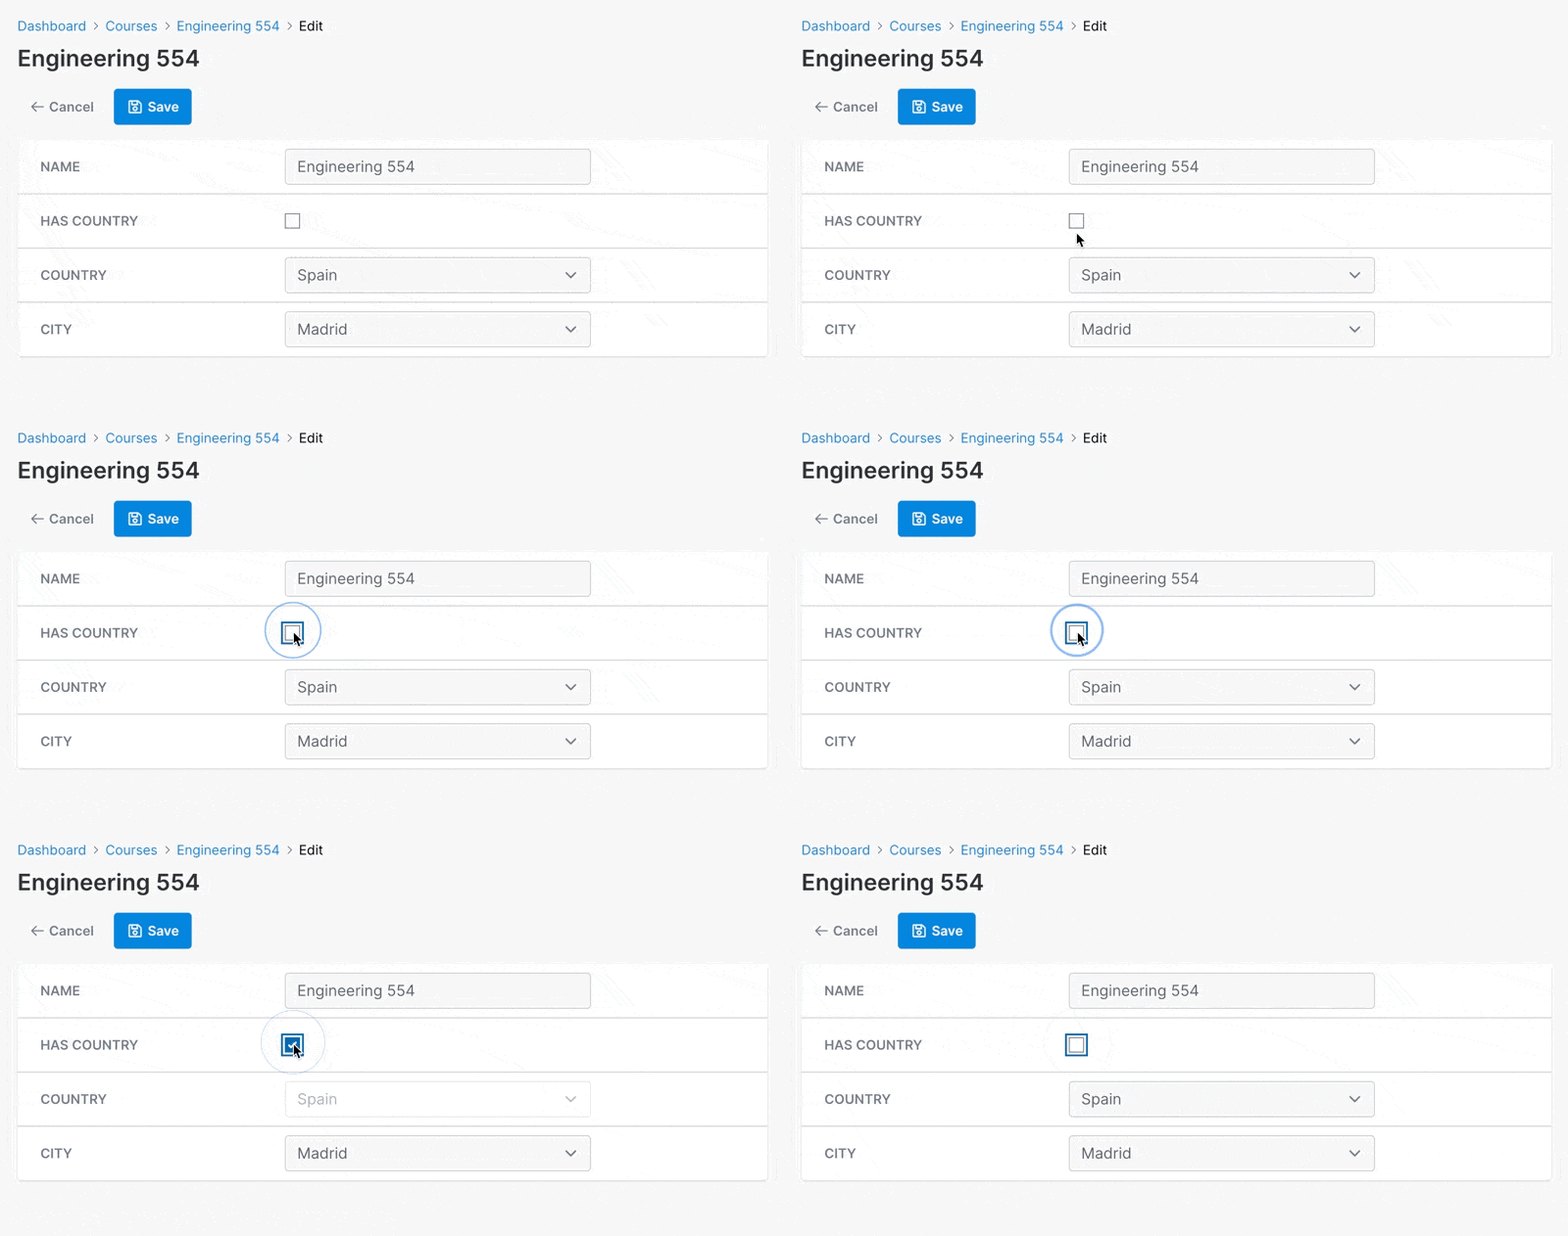
You may also target the wrapper element for that field if the target field has more than one input like the searchable polymorphic belongs_to field.
field :has_skills, as: :boolean, html: {
  edit: {
    input: {
      data: {
        action: "input->resource-edit#disable", # use the pre-made stimulus method on input
        resource_edit_disable_target_param: "countrySelectWrapper", # target the wrapper so all inputs are disabled
        # resource_edit_disable_targets_param: ["countrySelectWrapper"] # add more than one target to disable
      }
    }
  }
}
field :country, as: :select, options: Course.countries.map { |country| [country, country] }.to_h
resource-edit#debugOnInput
For debugging purposes only, the resource_edit Stimulus JS controller provides the debugOnInput method that outputs the event and value for an action to the console. Use this just to make sure you targeted your fields correctly. It doesn't have any real use.

Custom Stimulus controllers
Watch the demo videoThe bigger purpose of this feature is to create your own Stimulus JS controllers to bring the functionality you need to the CRUD interface.
Below is an example of how you could implement a city & country select feature where the city select will have its options changed when the user selects a country:
- Add an action to the country select to trigger a change.
- The stimulus method
onCountryChangewill be triggered when the user changes the country. - That will trigger a fetch from the server where Rails will return an array of cities for the provided country.
- The city field will have a
loadingstate while we fetch the results. - The cities will be added to the
cityselect field - If the initial value is present in the returned results, it will be selected.
- All of this will happen only on the
NewandEditviews because of the condition we added to theconnectmethod.
# app/avo/resources/course_resource.rb
class CourseResource < Avo::BaseResource
  self.stimulus_controllers = "course-resource"

  field :id, as: :id
  field :name, as: :text
  field :country, as: :select, options: Course.countries.map { |country| [country, country] }.to_h, html: {
    edit: {
      input: {
        data: {
          course_resource_target: "countryFieldInput", # Make the input a target
          action: "input->course-resource#onCountryChange" # Add an action on change
        }
      }
    }
  }
  field :city, as: :select, options: Course.cities.values.flatten.map { |city| [city, city] }.to_h, html: {
    edit: {
      input: {
        data: {
          course_resource_target: "cityFieldInput" # Make the input a target
        }
      }
    }
  }
endRails.application.routes.draw do
if defined? ::Avo
Avo::Engine.routes.draw do
scope :resources do
get "courses/cities", to: "courses#cities"
end
end
end
endclass Avo::CoursesController < Avo::ResourcesController
def cities
render json: get_cities(params[:country]) # return an array of cities based on the country we received
end
private
def get_cities(country)
return [] unless Course.countries.include?(country)
Course.cities[country.to_sym]
end
endclass Course < ApplicationRecord
def self.countries
["USA", "Japan", "Spain", "Thailand"]
end
def self.cities
{
USA: ["New York", "Los Angeles", "San Francisco", "Boston", "Philadelphia"],
Japan: ["Tokyo", "Osaka", "Kyoto", "Hiroshima", "Yokohama", "Nagoya", "Kobe"],
Spain: ["Madrid", "Valencia", "Barcelona"],
Thailand: ["Chiang Mai", "Bangkok", "Phuket"]
}
end
endimport { Controller } from "@hotwired/stimulus";
const LOADER_CLASSES = "absolute bg-gray-100 opacity-10 w-full h-full";
export default class extends Controller {
static targets = ["countryFieldInput", "cityFieldInput", "citySelectWrapper"];
static values = {
view: String,
};
// Te fields initial value
static initialValue;
get placeholder() {
return this.cityFieldInputTarget.ariaPlaceholder;
}
set loading(isLoading) {
if (isLoading) {
// create a loader overlay
const loadingDiv = document.createElement("div");
loadingDiv.className = LOADER_CLASSES;
loadingDiv.dataset.target = "city-loader";
// add the loader overlay
this.citySelectWrapperTarget.prepend(loadingDiv);
this.citySelectWrapperTarget.classList.add("opacity-50");
} else {
// remove the loader overlay
this.citySelectWrapperTarget
.querySelector('[data-target="city-loader"]')
.remove();
this.citySelectWrapperTarget.classList.remove("opacity-50");
}
}
async connect() {
// Add the controller functionality only on forms
if (["edit", "new"].includes(this.viewValue)) {
this.captureTheInitialValue();
// Trigger the change on load
await this.onCountryChange();
}
}
// Read the country select.
// If there's any value selected show the cities and prefill them.
async onCountryChange() {
if (this.hasCountryFieldInputTarget && this.countryFieldInputTarget) {
// Get the country
const country = this.countryFieldInputTarget.value;
// Dynamically fetch the cities for this country
const cities = await this.fetchCitiesForCountry(country);
// Clear the select of options
Object.keys(this.cityFieldInputTarget.options).forEach(() => {
this.cityFieldInputTarget.options.remove(0);
});
// Add blank option
this.cityFieldInputTarget.add(new Option(this.placeholder));
// Add the new cities
cities.forEach((city) => {
this.cityFieldInputTarget.add(new Option(city, city));
});
// Check if the initial value is present in the cities array and select it.
// If not, select the first item
const currentOptions = Array.from(this.cityFieldInputTarget.options).map(
(item) => item.value
);
if (currentOptions.includes(this.initialValue)) {
this.cityFieldInputTarget.value = this.initialValue;
} else {
// Select the first item
this.cityFieldInputTarget.value =
this.cityFieldInputTarget.options[0].value;
}
}
}
// Private
captureTheInitialValue() {
this.initialValue = this.cityFieldInputTarget.value;
}
async fetchCitiesForCountry(country) {
if (!country) {
return [];
}
this.loading = true;
const response = await fetch(
`${window.Avo.configuration.root_path}/resources/courses/cities?country=${country}`
);
const data = await response.json();
this.loading = false;
return data;
}
}This is how the fields behave with this Stimulus JS controller.

Use Stimulus JS in a tool
There are a few steps you need to take in order to register the Stimulus JS controller in the current app context.
First, you need to have a JS entrypoint (ex: avo.custom.js) and have that loaded in the _head partial. For instructions on that please follow these steps to add it to your app (importmaps or esbuild).
Set up a controller
// app/javascript/controllers/sample_controller.js
import { Controller } from "@hotwired/stimulus";

export default class extends Controller {
  connect() {
    console.log("Hey from sample controller 👋");
  }
}
Register that controller with the current Stimulus app
// app/javascript/avo.custom.js
import SampleController from "controllers/sample_controller";

// Hook into the stimulus instance provided by Avo
const application = window.Stimulus;
application.register("course-resource", SampleController);

// eslint-disable-next-line no-console
console.log("Hi from Avo custom JS 👋");
Use the controller in the Avo tool
<!-- app/views/avo/_sample_tool.html.erb -->
<div data-controller="sample">
  <!-- content here -->
</div>
Done 🙌 Now you have a controller connecting to a custom Resource tool or Avo tool (or Avo views).