Field options
Avo fields are dynamic and can be configured using field options.
There are quite a few common field options described on this page that will work with most fields (but some might not support them), and some custom field options that only some fields respond to that are described on each field page.
Common field option example
# disabled will disable the field on the `Edit` view
field :name, as: :text, disabled: true
field :status, as: :select, disabled: true
Custom field option example
# options will set the dropdown options for a select field
field :status, as: :select, options: %w[first second third]
Change field name
To customize the label, you can use the name property to pick a different label.
field :is_available, as: :boolean, name: "Availability"
Showing / Hiding fields on different views
There will be cases where you want to show fields on different views conditionally. For example, you may want to display a field in the New and Edit views and hide it on the Index and Show views.
For scenarios like that, you may use the visibility helpers hide_on, show_on, only_on, and except_on methods. Available options for these methods are: :new, :edit, :index, :show, :forms (both :new and :edit) and :all (only for hide_on and show_on).
Version 3 introduces the :display option that is the opposite of :forms, referring to both, :index and :show
Be aware that a few fields are designed to override those options (ex: the id field is hidden in Edit and New).
field :body, as: :text, hide_on: [:index, :show]Please read the detailed views page for more info.
Field Visibility
You might want to restrict some fields to be accessible only if a specific condition applies. For example, hide fields if the user is not an admin.
You can use the visible block to do that. It can be a boolean or a lambda. Inside the lambda, we have access to the context object and the current resource. The resource has the current record object, too (resource.record).
field :is_featured, as: :boolean, visible: -> { context[:user].is_admin? }  # show field based on the context object
field :is_featured, as: :boolean, visible: -> { resource.name.include? 'user' } # show field based on the resource name
field :is_featured, as: :boolean, visible: -> { resource.record.published_at.present? } # show field based on a record attribute
WARNING
On form submissions, the visible block is evaluated in the create and update controller actions. That's why you have to check if the resource.record object is present before trying to use it.
# `resource.record` is nil when submitting the form on resource creation
field :name, as: :text, visible -> { resource.record.enabled? }

# Do this instead
field :name, as: :text, visible -> { resource.record&.enabled? }
Computed Fields
You might need to show a field with a value you don't have in a database row. In that case, you may compute the value using a block that receives the record (the actual database record), the resource (the configured Avo resource), and the current view. With that information, you can compute what to show on the field in the Index and Show views.
field 'Has posts', as: :boolean do
  record.posts.present?
rescue
  false
endThis example will display a boolean field with the value computed from your custom block.
Fields Formatter
Sometimes you will want to process the database value before showing it to the user.
There are several ways to format fields.
Common formatting options
In all cases, you have access to a bunch of variables inside this block, all the defaults that Avo::ExecutionContext provides plus value, record, resource, view and field.
-> format_using
INFO
Notice that this block will have effect on all views.
Formatting affects copyable value, when using format_using with copyable, the formatted value is what gets copied to the clipboard, not the original database value. For example, using format_using: -> { value.truncate(20) } will copy the truncated text (including the ...). If you need to display a truncated value while copying the full value, consider using CSS truncation via the html option instead of format_using.
field :is_writer, as: :text, format_using: -> {
  if view.form?
    value
  else
    value.present? ? '👍' : '👎'
  end
}
This example snippet will make the :is_writer field generate 👍 or 👎 emojis instead of 1 or 0 values on display views and the values 1 or 0 on form views.

Another example:
field :company_url,
  as: :text,
  format_using: -> {
    if view.new? || view.edit?
      value
    else
      link_to(value, value, target: "_blank")
    end
  } do
  main_app.companies_url(record)
end
-> format_{view}_using
Avo provides helper methods to format fields based on the current view.
format_index_using- Format the field value only for the index viewformat_show_using- Format the field value only for the show viewformat_edit_using- Format the field value only for the edit viewformat_new_using- Format the field value only for the new viewformat_form_using- Format the field value only for the forms view (new and edit)format_display_using- Format the field value only for the display view (index and show)
This methods are available for all fields.
Example on how to format a field in the index and show views:
field :is_writer, format_display_using: -> { value.present? ? '👍' : '👎' }Formatting with Rails helpers
You can also format using Rails helpers like number_to_currency (note that view_context is used to access the helper):
field :price, as: :number, format_using: -> { view_context.number_to_currency(value) }Parse value before update
When it's necessary to parse information before storing it in the database, the update_using option proves to be useful. Inside the block you can access the raw value from the form, and the returned value will be saved in the database.
field :metadata,
  as: :code,
  update_using: -> do
    ActiveSupport::JSON.decode(value)
  end
Sortable fields
One of the most common operations with database records is sorting the records by one of your fields. For that, Avo makes it easy using the sortable option.
Add it to any field to make that column sortable in the Index view.
field :name, as: :text, sortable: true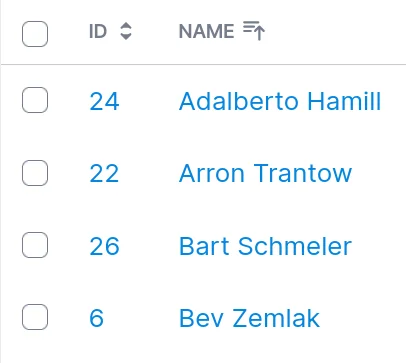
Related:
Custom sortable block
When using computed fields or belongs_to associations, you can't set sortable: true to that field because Avo doesn't know what to sort by. However, you can use a block to specify how the records should be sorted in those scenarios.
class Avo::Resources::User < Avo::BaseResource
  field :is_writer,
    as: :text,
    sortable: -> {
      # Order by something else completely, just to make a test case that clearly and reliably does what we want.
      query.order(id: direction)
    },
    hide_on: :edit do
      record.posts.to_a.size > 0 ? "yes" : "no"
    end
end
The block receives the query and the direction in which the sorting should be made and must return back a query.
In the example of a Post that has_many Comments, you might want to order the posts by which one received a comment the latest.
You can do that using this query.
class Avo::Resources::Post < Avo::BaseResource
  field :last_commented_at,
    as: :date,
    sortable: -> {
      query.includes(:comments).order("comments.created_at #{direction}")
    }
endclass Post < ApplicationRecord
has_many :comments
def last_commented_at
comments.last&.created_at
end
endPlaceholder
Some fields support the placeholder option, which will be passed to the inputs on Edit and New views when they are empty.
field :name, as: :text, placeholder: 'John Doe'
Required
To indicate that a field is mandatory, you can utilize the required option, which adds an asterisk to the field as a visual cue.
Avo automatically examines each field to determine if the associated attribute requires a mandatory presence. If it does, Avo appends the asterisk to signify its mandatory status. It's important to note that this option is purely cosmetic and does not incorporate any validation logic into your model. You will need to manually include the validation logic yourself, such as (validates :name, presence: true).
field :name, as: :text, required: true
You may use a block as well. It will be executed in the Avo::ExecutionContext and you will have access to the view, record, params, context, view_context, and current_user.
field :name, as: :text, required: -> { view == :new } # make the field required only on the new view and not on editDisabled
When you need to prevent the user from editing a field, the disabled option will render it as disabled on New and Edit views and the value will not be passed to that record in the database. This prevents a bad actor to go into the DOM, enable that field, update it, and then submit it, updating the record.
field :name, as: :text, disabled: true
Disabled as a block
Since v2.14You may use a block as well. It will be executed in the Avo::ExecutionContext and you will have access to the view, record, params, context, view_context, and current_user.
field :id, as: :number, disabled: -> { view == :edit } # make the field disabled only on the new edit viewReadonly
When you need to prevent the user from editing a field, the readonly option will render it as disabled on New and Edit views. This does not, however, prevent the user from enabling the field in the DOM and send an arbitrary value to the database.
field :name, as: :text, readonly: trueDefault Value
When you need to give a default value to one of your fields on the New view, you may use the default block, which takes either a fixed value or a block.
# using a value
field :name, as: :text, default: 'John'

# using a callback function
field :level, as: :select, options: { 'Beginner': :beginner, 'Advanced': :advanced }, default: -> { Time.now.hour < 12 ? 'advanced' : 'beginner' }
Help text
Sometimes you will need some extra text to explain better what the field is used for. You can achieve that by using the help method. The value can be either text or HTML.
# using the text value
field :custom_css, as: :code, theme: 'dracula', language: 'css', help: "This enables you to edit the user's custom styles."

# using HTML value
field :password, as: :password, help: 'You may verify the password strength <a href="http://www.passwordmeter.com/">here</a>.'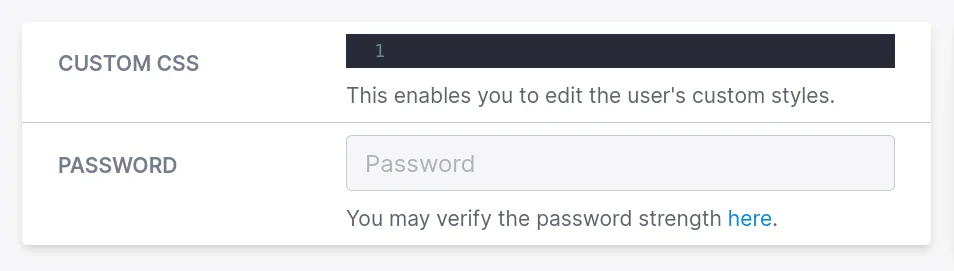
Nullable
When a user uses the Save button, Avo stores the value for each field in the database. However, there are cases where you may prefer to explicitly instruct Avo to store a NULL value in the database row when the field is empty. You do that by using the nullable option, which converts nil and empty values to NULL.
You may also define which values should be interpreted as NULL using the null_values method.
# using default options
field :updated_status, as: :status, failed_when: [:closed, :rejected, :failed], loading_when: [:loading, :running, :waiting], nullable: true

# using custom null values
field :body, as: :textarea, nullable: true, null_values: ['0', '', 'null', 'nil', nil]
Link to record
Sometimes, on the Index view, you may want a field in the table to be a link to that resource so that you don't have to scroll to the right to click on the Show icon. You can use link_to_record to change a table cell to be a link to that record.
# for id field
field :id, as: :id, link_to_record: true

# for text field
field :name, as: :text, link_to_record: true

# for gravatar field
field :email, as: :gravatar, link_to_record: true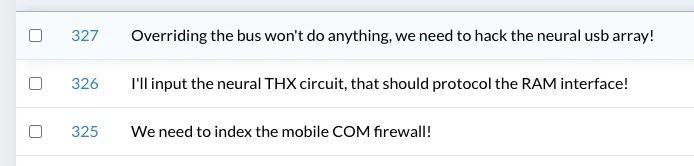
You can add this property on id, text, and gravatar fields.
Optionally you can enable the global config id_links_to_resource. More on that on the id links to resource docs page.
Related:
Align text on Index view
It's customary on tables to align numbers to the right. You can do that using the html option.
class Avo::Resources::Project < Avo::BaseResource
  field :users_required, as: :number, html: {index: {wrapper: {classes: "text-right"}}}
end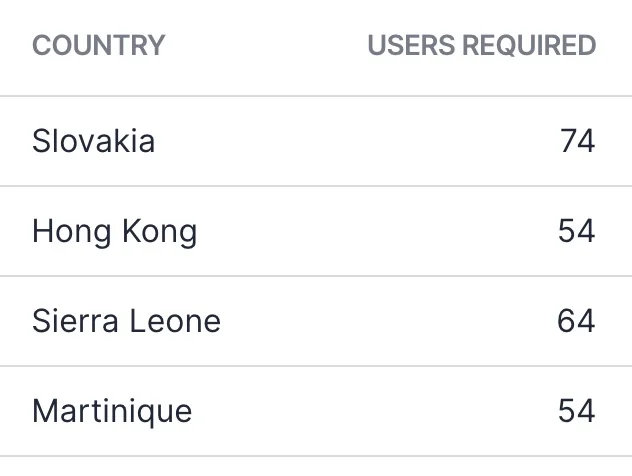
Stacked layout
For some fields, it might make more sense to use all of the horizontal area to display it. You can do that by changing the layout of the field wrapper using the stacked option.
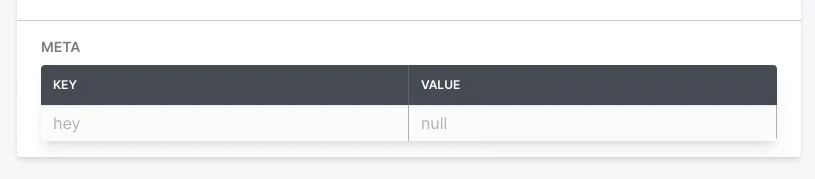
field :meta, as: :key_value, stacked: trueinline layout (default)

stacked layout
Global stacked layout
You may also set all the fields to follow the stacked layout by changing the field_wrapper_layout initializer option from :inline (default) to :stacked.
Avo.configure do |config|
  config.field_wrapper_layout = :stacked
end
Now, all fields will have the stacked layout throughout your app.
Field options
-> components
The field's components option allows you to customize the view components used for rendering the field in all, index, show and edit views. This provides you with a high degree of flexibility.
Ejecting the field components
To start customizing the field components, you can eject one or multiple field components using the avo:eject command. Ejecting a field component generates the necessary files for customization. Here's how you can use the avo:eject command:
Ejecting All Components for a Field
$ rails g avo:eject --field-components FIELD_TYPE --scope admin
Replace FIELD_TYPE with the desired field type. For instance, to eject components for a Text field, use:
$ rails g avo:eject --field-components text --scope admin
This command will generate the files for all the index, edit and show components of the Text field, for each field type the amount of components may vary.
For more advanced usage check the eject documentation.
Scope
If you don't pass a --scope when ejecting a field view component, the ejected component will override the default components all over the project.
Check eject documentation for more details.
Customizing field components using components option
Here's some examples of how to use the components option in a field definition:
field :description,
  as: :text,
  components: {
    index_component: Avo::Fields::Admin::TextField::IndexComponent,
    show_component: Avo::Fields::Admin::TextField::ShowComponent,
    edit_component: "Avo::Fields::Admin::TextField::EditComponent"
}field :description,
as: :text,
components: -> do
{
show_component: Avo::Fields::Admin::TextField::ShowComponent,
edit_component: "Avo::Fields::Admin::TextField::EditComponent"
}
endThe components block it's executed using Avo::ExecutionContent and gives access to a bunch of variables as: resource, record, view, params and more.
<view>_component is the key used to render the field's <view>'s component, replace <view> with one of the views in order to customize a component per each view.
Initializer
It's important to keep the initializer on your custom components as the original field view component initializer.
-> html
Attach HTML attributes
Using the html option you can attach style, classes, and data attributes. The style attribute adds the style tag to your element, classes adds the class tag, and the data attribute the data tag to the element you choose.
You may find more detailed information about the HTML attributes here.
-> summarizable
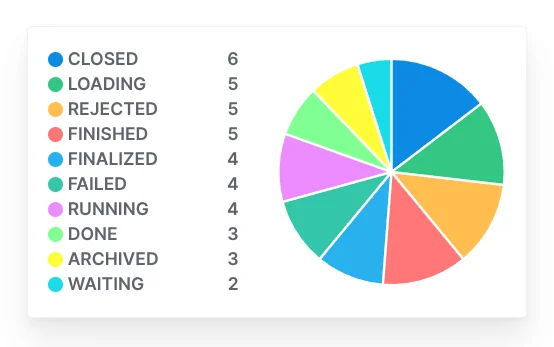
The summarizable option allows you to generate a visual summary of a column's data distribution. This feature provides a quick and intuitive overview of your dataset by displaying a chart within the table header.
You can enable summarizable for a column like this:
def fields
  field :status, as: :select, summarizable: true
  field :status, as: :badge, summarizable: true
end
How It Works
When summarizable is enabled, a chart icon will appear in the table header for that column. Clicking on the icon will display a summary chart based on the data in that column. The chart provides a visual representation of data distribution, making it easier to analyze trends.
-> for_attribute
Allows to specify the target attribute on the model for each field. By default the target attribute is the field's id.
Usage example:
field :status, as: :select, options: [:one, :two, :three], only_on: :forms

field :secondary_field_for_status,
  as: :badge,
  for_attribute: :status,
  options: {info: :one, :success: :two, warning: :three},
  except_on: :forms,
  help: "Secondary field for status using the for_attribute option"
-> meta
This handy option enables you to send arbitrary information to the field. It's especially useful when you're building your own custom fields or you are using custom components for the built-in fields.
Usage example:
# meta as a hash
field :status,
  as: :custom_status,
  meta: {foo: :bar}

# meta as a block
field :status,
  as: :badge,
  meta: -> do
    record.statuses.map(&:id)
  end
Within your field template you can now access the @field.meta attribute.
<%= field_wrapper **field_wrapper_args do %>
  <% if @field.meta[:foo] %>
    <%= @resource.record.foo_value %>
  <% else %>
    <%= @field.value %>
  <% end %>
<% end %>
-> copyable
The copyable option enables users to copy the field's value to their clipboard. When set to true, a clipboard icon appears when hovering over the field value, allowing easy copying. This feature can be particularly useful for fields such as unique identifiers, URLs, or other text-based content that users may frequently need to copy.
field :name, as: :text, copyable: trueThe copyable option is available for text-based fields such as :text, :textarea, and others that render text values.